 Windows Desktop Search (WDS) is Microsoft’s next-generation data search tool, capable of detecting over 200 different file formats at astonishing speeds while still relying on a familiar operational mechanism of indexing search data. Compared to the built-in utilities of Windows, WDS has made a significant breakthrough in Microsoft’s search technology, which many have long awaited. You can download WDS for free (4.25 MB) at the following address:
Minimum system requirements for installing WDS: Windows 2000 SP4, Windows XP, or Windows Server 2003 SP1, a CPU speed of 500 MHz (recommended is 1 GHz), 128 MB of RAM (recommended is 256 MB), 500 MB of free space for the indexing data drive, and a recommended screen resolution of 1024 x 768.
Configuring WDS with the Wizard
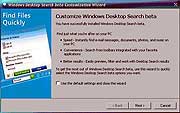
After completing the installation and launching the program for the first time, the WDS configuration window will appear.
If you agree to use the default settings that have been preset, check the box for “Use the default settings” and close this wizard; otherwise, click the Next button.
In the next window, Microsoft asks if you would like to contribute to the company’s software development plan by providing your experiences during usage. Depending on your preference, check either “Yes, I would like to participate in the program” or “No, I don’t want to participate in the program“, then click Next.
In the subsequent window, you need to select the locations on your hard drive that you want WDS to index for search, corresponding to the places that will benefit from WDS’s rapid search technology. There are three different options: E-mail and all hard disks (e-mail and entire drive), E-mail and My Documents (e-mail and just the My Documents folder), and Custom folders and e-mail locations (allows you to select the desired locations). If you check the “Custom folders and e-mail locations” option, click the Browse button. In the dialog that appears, navigate through the folder tree and select the locations you want to index for search, then click OK. The remaining three options in this window are Automatically start Windows Desktop Search beta when I sign in to my computer (always start WDS with Windows), Index e-mail attachments (index search for attachments in emails), and Index new items while on battery power (index search even when the laptop is running on battery), which you can leave as default and click Next.
In the final window that appears, you will see two options: See a list of available add-ins (view a list of add-ons for WDS) and Display the Windows Search Deskbar (place the WDS search toolbar on the Taskbar). You should keep the default checks for these two options, then click Finish.
Immediately afterward, the Windows Search Deskbar will appear on the Taskbar, and at the same time, a pop-up webpage will open linking to http://addins.msn.com. Here, you can download many add-ins designed for WDS for free.
Creating Search Index
The next step is to right-click on the WDS magnifying glass icon in the system tray and select the “Index Now” command to execute the search indexing at the locations you selected above. The speed of this process depends on the number of folders and files at those locations. To check the indexing status, select the “Indexing Status” command. Two important notes:
– While WDS is indexing, if you use another third-party program, the indexing process may pause, and you will need to reactivate it.
– Indexing for items in Microsoft Outlook and Outlook Express only takes effect when both programs are running.
Using WDS
In the meantime, you can test how fast WDS can search by right-clicking on the WDS magnifying glass icon in the system tray and selecting “Search Now” (or clicking the blue button on the right of the Windows Search Deskbar) to open WDS’s interactive interface. Next, enter a keyword related to the file/folder you want to find (within the range WDS has finished indexing) in the search box, then press Enter. Immediately, a list of files/folders related to the keyword you want to find will appear before you.
The interactive interface of WDS is designed to be very intuitive. On the toolbar, there are buttons that allow you to limit the search scope to specific file formats, including: Documents (search only document file formats), E-mail (search only emails), Others (various options for file formats like contacts, attachments, images, music, videos, etc.), and Everything (search all file formats supported by WDS). The window on the right is used to preview the content inside a file that has just been found.
Reconfiguring WDS
Later, when you want to reconfigure WDS’s operating parameters, right-click on the magnifying glass icon in the system tray and select “Desktop Search Options.” In the window that appears, under the Indexing > Choose what you want to index branch, reselect the locations on your hard drive that you want to index, then click the Rebuild Index button. Under the Advanced > Index location branch, click the Change button to select a new folder for the indexed data (default is C:Documents and SettingsUsernameLocal SettingsApplication DataMicrosoft). Under the Deskbar > Deskbar Search Options branch, set the default search style for the Windows Search Deskbar with two options: Desktop (normal search like in the WDS interactive interface) or Web (search in the format of information listed on a webpage). If you want the Windows Search Deskbar to disappear from the Taskbar, click the Hide Deskbar button. Once you have configured all settings, click OK to apply the changes.
Pham Hong Quan


