The VLAN (Virtual LAN) solution is often implemented to isolate networked computers; however, many organizations do not have the means to equip VLAN-supported switches. In such cases, using IPSec is an effective solution to protect network resources, such as shared folders.
In the example model, there are two groups of computers, referred to as Group 1 and Group 2. We will configure IPSec so that only computers within the same group can access each other’s shared folders.
To access the shared folder, operating systems XP/2000/2003 use TCP protocols on port 139 and port 445. Therefore, we will create a policy to filter these ports.
1. Create and Configure IP Security Policy for the First Computer
Step 1: Click Start, Run, then type MMC and press Enter to open the Microsoft Management Console.
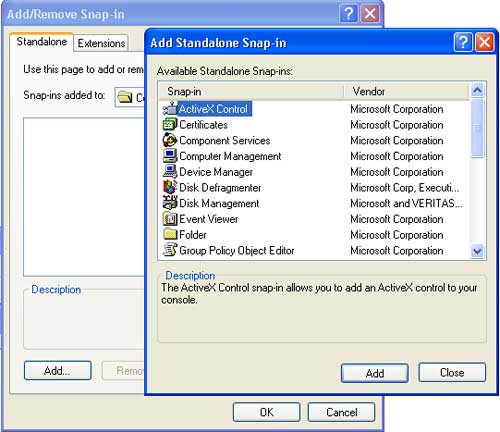
Step 2: In the Console window, select File, then choose Add/Remove Snap-in.
Step 3: In the newly opened dialog, click Add. In the Add Standalone Snap-in dialog, select IP Security Policy Management and then click Add.
Step 4: In the Select Computer or Domain dialog, choose Local computer and click Finish.
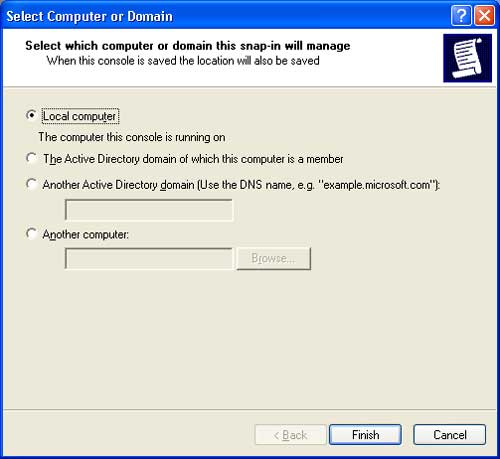
Step 5: Next, click Finish -> Close, then OK to return to the MMC screen.
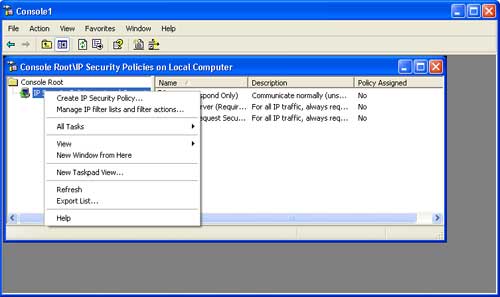
Step 6: Right-click on IP Security Policies on Local Computer and select Create IP Security Policy. Click Next to continue.
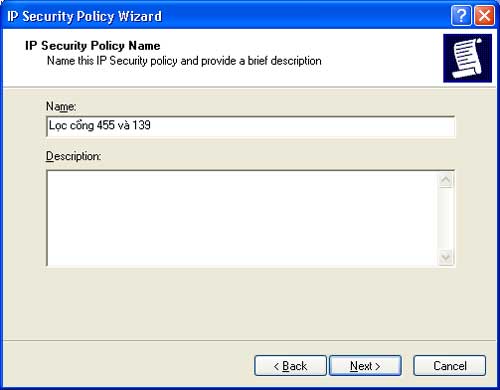
Step 7: Next, enter the name of the policy to create in the name field, for example, “Filter Ports 445 and 139”. Click Next to continue.
Step 8: Select Activate the default response rule, then click Next. Next, in the Default Response Rule Authentication Method, choose Use this string to protect the key exchange (preshared key) and enter “1234”. Click Next to continue.
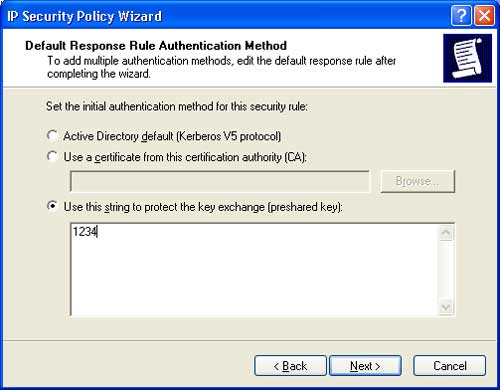
Step 9: Select Edit properties, then click Finish to complete.
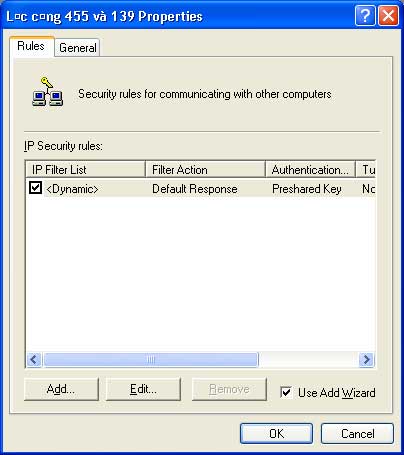
Step 10: In the “Filter Ports 445 and 139” dialog, uncheck the option and click Add. Continue by selecting Next and choosing This rule does not specify a tunnel. Click Next, select All Connection, then click Next; select Use this string to protect the key exchange (preshared key) and enter “1234”. Click Next to continue.
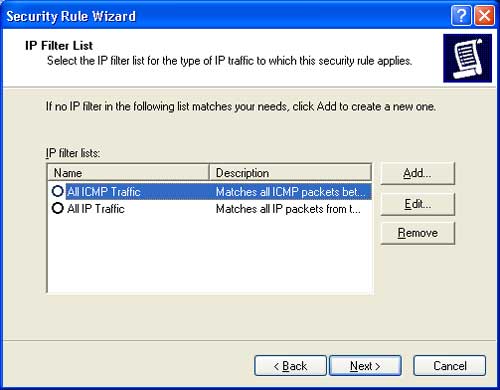
Step 11: In the IP Filter List dialog, click Add. In the name field, enter a name for the list, for example, “Ports 445, 139 In-Out” (it’s advisable to choose a memorable name). Click Add, then Next -> Next to continue.
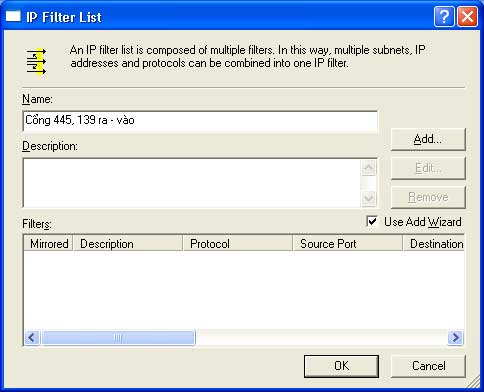
Step 12: In the IP Filter Wizard dialog, enter a description in the Description field, for example, “445 Out”. Click Next to continue.
Step 13:
For the IP Traffic Source Address, select My IP Address. Click Next to continue.
For the IP Traffic Destination Address, select Any IP Address. Click Next to continue.
For the Select a protocol type, choose TCP. Click Next to continue.
In the IP Protocol Port dialog, select To this port and enter the value 445.
Click Next then Finish to complete.
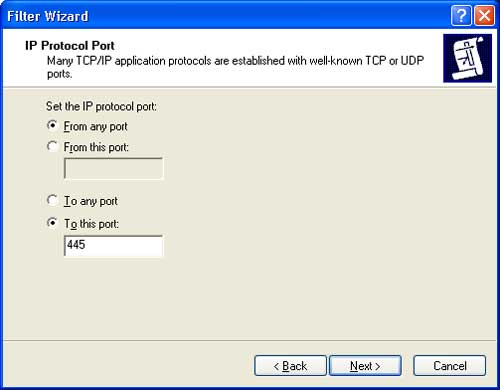
Step 14: Repeat from Step 12 to Step 13 three more times with the following parameters:
– Iteration 1:
* Description: Port 445 In
* Source Address: My IP Address
* Destination Address: Any IP Address
* Protocol Type: TCP
* IP Protocol Port: Select From this port value 445
– Iteration 2:
* Description: Port 139 Out
* Source Address: My IP Address
* Destination Address: Any IP Address
* Protocol Type: TCP
* IP Protocol Port: Select To this port value 139
– Iteration 3:
* Description: Port 139 In
* Source Address: My IP Address
* Destination Address: Any IP Address
* Protocol Type: TCP
* IP Protocol Port: Select From this port value 139
Upon completion, we get the result as shown. Click OK to continue.
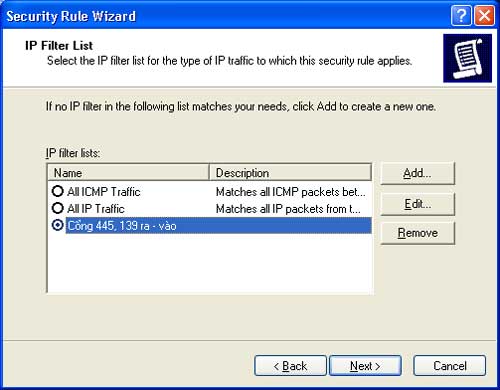
Step 15: In the Security Rule Wizard dialog, select the Ports 445, 139 In-Out option. Click Next to continue.
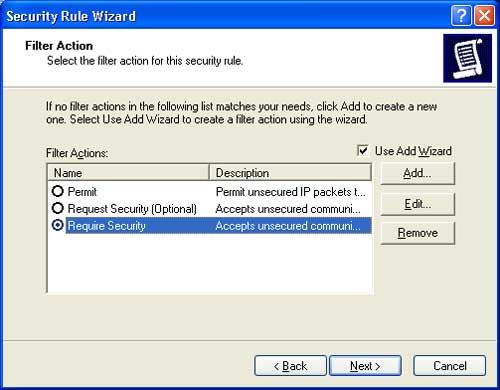
Step 16: In the Filter Action dialog, select Require Security. Click Edit to change the parameters of the Filter Action.
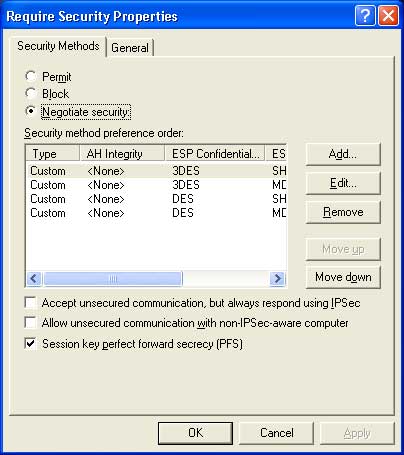
Step 17: In the Require Security Properties dialog, select Use session key perfect forward secrecy (PFS). Click OK to return, then click Next to continue.
Step 18: Next, in the Authentication Method dialog, select Use this string to protect the key exchange (preshared key) and enter “1234”.
You may use a more complex string; however, it must be noted that computers within the same group will have the same preshared key.
This dialog also contains two options that we do not select, which have the following meanings:
– Active Directory default (Kerberos V5 protocol): Only select this if your computer is a member logged into a server (Windows Server 2000/2003) with Active Directory installed. Kerberos V5 is the encrypted data protocol used among users within AD.
– Use a certificate from this certification authority (CA): This method uses authentication based on Certificate Authority (CA). To use this method, you need to connect to a server with Certificate Service installed to request and set up a CA for IPSec.
Click Next to continue, then Finish to return.
Step 19: In the Edit Rule Properties dialog, select the “Ports 445, 139 In-Out” option and click Apply then OK to return.
Step 20: Right-click on the newly created IP Security Policy (Filter Ports 445 and 139) and select Assign.
2. Copy IP Security for the Next Computer
You can perform the 20 steps above for computer 2, then computer 3. However, this can be very time-consuming and may lead to errors that result in communication issues. We will use the netsh tool to export the IPsec Policy to a file and then import this file into another computer. Here’s how to do it:
Step 1: Preparation
Select Start, Run, type cmd, and press Enter. In the DOS prompt, type the following command to create the Ipsec directory on drive C:
md C:Ipsec
Step 2: Export IPSec policy to a file named Loc445va139.ipsec
Type the following command:
netsh ipsec static exportpolicy file = c:IpsecLoc445va139
(the .ipsec extension is automatically added by netsh)
Step 3: Import IPSec Policy from the Loc445va139.ipsec file
Copy the Loc445va139.ipsec file to the C:IPsec folder on computer 2 and type the following command:
netsh ipsec static importpolicy file = c:IpsecLoc445va139.ipsec
On computer 2, continue with steps 1 to 5 from Part 1 to access the IP Security Management screen. Right-click on IP Security Policy (Filter Ports 445 and 139) and select Assign.
Then proceed with step 3 on computer 3.
3. Implement for Group 2
For computers 4 and 5 in Group 2, we proceed similarly as for Group 1 as outlined above. However, the preshared key value must differ from that of Group 1.
Nguyễn Đắc Tiến
Email: [email protected]


